Humidity Damage, Mandolin Repair
‘The marketers seem to grasp that it is not the product but the practice that is really attractive.’
Shop Class as Soulcraft: An inquiry into the Value of Work.
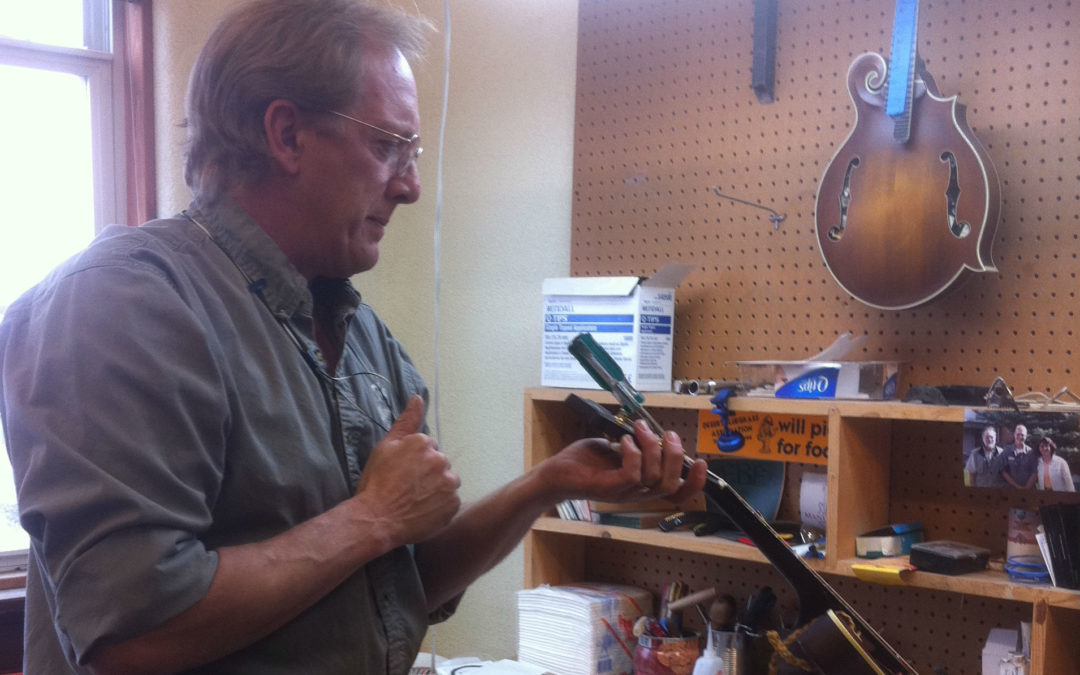
One of the most damaging repairs Bruce gets in (unfortunately fairly often) is due to over humidification. Remember how he sniffs each instrument? One time an instrument had so much mold (from Hawaii including a fair amount of rust and gecko droppings) that we thought he might have been poisoned after breathing it in.
Many of you will think this information is elementary but, as mentioned, we see this type of damage all of the time and much of it is preventable. Here is the real scenario: You save up, sell a guitar, and buy a new mandolin! Of course you talk about it at your local music store, go online and want to treat it right. In three months the finish is starting to look a little cloudy and it’s difficult to play so you send it back. Bruce opens the case and eau du musty trunk permeates the room, he grabs up three honking humidifiers from the case, one of which is snaked down into the soundhole, throws them in the garbage muttering the whole time… You are upset that it is not as issue covered under warranty! and then have to wait several more months while the instrument shrinks to its intended size (dryer fabric sheets are put in the case but some cases find their way directly to the trash). Unhappiness all around.

In a nutshell, you worry about your instrument drying out and cracking, glue breaking loose, finish damage, etc., however the wood that goes into your mandolin is very dry (10-12% when made into instrument parts) and builders try to keep their shops around the 30-50% humidity range. It takes quite a bit for an instrument to get too dry. Excessive heat is the real killer! The Mandolin family of instruments can tolerate changes in temp and humidity much better than its flat-topped cousin but don’t hang your instrument too close to the wood stove or furnace vent, or leave it in a hot car all day, and then wonder why the lacquer has checked and seams are started to separate.
If your mandolin is over humidified it will take weeks, and even months, to dry out and is hard to play as you chase action and intonation around while it’s drying. If you decide to ignore it during this period, here comes the premature plane and re-fret to flatten the now dry and bowed fingerboard. If extremely wet the seams and braces let go and the finish peels, especially if heat is added. This causes a big repair of regluing, and in Bruce’s opinion, the glue joints are never as good as the original. Worn finish happens on any instrument, but peeling finish is ugly and refinishing an entire instrument is costly.
Why is over humidification happening and what are the solutions? First, it is never recommended to put anything holding water inside the instrument body- it’s all raw wood in there and the sound chamber is just not that big. Many players use In-the-case humidifiers that are intended for guitars and thus way too much for the mando, also gauges are used that aren’t accurate or quit working. Bruce recommends running your hand over the back of your instrument and if you can feel a pronounced curl of the maple, it’s too damp. If the action has suddenly become uncomfortable, the top is swelling. Remove all humidifiers, keep it in the case, (unless it’s already smelling like the old trunk) and continually check the neck and make adjustments to keep the fingerboard flat.
The carved instrument family acclimates to its environment and has an adjustable bridge and truss rod to take care of the little tweaks necessary to action and intonation. It goes from the shop or store to your house and will acclimatize to its everyday environment. Here’s the controversial part- eh hem- humidification is very rarely needed. Remember where it came from and many areas are much more humid. Most of our houses are pretty climate controlled all year round. If you always play inside and keep it hanging on the wall where it’s handy you may hear it pop once in a while with no accompanying problems. If you take it from air conditioning to an outside summer jam, or fly from Florida to Montana, let it acclimatize just a bit (adjust it as needed) and jam. Continuous fussing won’t change anything and can lead to the dreaded over humidification.
Your instrument should be able to go where you play, not dictate it. If well made, mandolins are tough little buggers. If you are an active player, running into extremes is inevitable, but with a little common sense and attention to what your instrument is telling you (playablity, intonation) and with a little TLC it will serve you well wherever you play.
Mandolin Repair, Necks, TroubleShooting, Truss Rod
Preventable Repair #2
The neck on your instrument is bowed because the truss rod has been neglected.
There is a lot of fear involved in adjusting your instrument’s truss rod on your own, even by those who think nothing of sky diving or playing their mando in front of a huge crowd. When adjusting the rod the neck often makes snap, crackle and popping noises- and then you start to sweat while thinking, ‘what have I done!?’ Some of this fear is generated by a few horror stories that make the rounds. Mary may have contributed by posting this picture, on MandolinCafe, relating that the rod was sticking out of the back of the neck.
 Yes, cringe worthy and anxiety producing however most adjustments are done with no problems at all. I posted it again because it’s very dramatic but mostly to show how important it is to keep an eye on the neck of your mandolin and keep up with needed adjustments. I believe that anyone and everyone should pay attention, at least monthly, to “neck health” and learn how to adjust the truss rod of their instrument. The picture above is an example of a truss rod that most probably was NEVER adjusted before, then an attempt was made to force straighten the neck– trying to solve a problem created over years in a single hair rising session. Over an extended period of time, if not corrected, the neck will settle into a position where the truss rod is no longer able to straighten, requiring some TLC from a luthier.
Why adjust the truss rod: Environmental factors such as heat and humidity will expand and contract your instrument’s tone woods including the neck, affecting string height (action) and neck station. The strings exert pressure on the neck (and the top) pulling the peghead up towards the tailpiece. This string pressure is also the reason you should loosen the strings if your mando is going into long-term storage (be sure to dig it out of the closet or from under the bed to check the flatness of the neck periodically), or being shipped (with the possibility of taking a hit).
If your truss rod is not adjusted when needed (to keep the neck flat) eventually it will, at minimum, need a plane and re-fret and as worst case a new neck (as the picture above demonstrates). In reality, the truss rod is your friend. It was a great invention that will keep your neck playable.
When to adjust the truss rod: Monthly, changing seasons, travel, storage, uncomfortable or hard to play, noticeable bow in neck. See trouble shooting below.However, after reading this please free to contact The Bruce if you need additional information or a pep talk.

Be brave of heart, paint your face blue and charge through the directions below.
The correct order in basic setup: Truss rod, Action, Intonation.
TRUSS ROD ADJUSTMENT
The neck should be near flat as you sight down or lay the edge of ruler down the length of the fretboard on both the treble and bass edges. Under full string tension, just adjust the rod 1/4 turn at a time, checking the neck as you go. The neck may groan and pop a little. If the neck is slightly twisted, use the first edge to reach true as a good place to stop.
1. To take relief (bow) out of your neck, tighten the truss rod. (turn CLOCKWISE)
2. To relieve hump in the neck, (rare, unless you’ve over tightened the rod) loosen the truss rod. (turn COUNTER CLOCK-WISE)
- If the rod will not move or spins freely and you still have a bow, it would be best to visit a local luthier or send it to Bruce.
CHECK ACTION: More often than not you’ll have to adjust the action (playability) after a successful adjustment session (the fingerboard is flat). Tightening the truss rod, bringing the neck back to true, will lower the action. A good medium action on your mandolin is 1/16” from the top of the 12th fret to the bottom of the G string and a hair less on the E side. Most mandolins will have some way to adjust your action at the bridge. If you’ve over tightened the rod, the instrument will buzz on the first five frets at a good action.
CHECK INTONATON: If you’ve done either a major truss rod or action adjustment, the intonation my need to be tweaked. If the instrument plays sharp at the 12th fret, loosen all but the outside G and E strings and gently move the bridge towards the tailpiece checking the intonation on the outside strings as you go. Small movements of the bridge will serve you well in this process. If it plays flat, move the bridge towards the peghead. When you are satisfied with the intonation you can bring the remaining strings up to pitch while insuring the saddle hasn’t started leaning towards the peghead as you go (we’ve had many sent in that turned out to be just the saddle leaning, robbing the instrument of tone and volume).
Note: If you play with a high action, your bridge placement will be slightly closer to the fingerboard.
BASIC TROUBLE SHOOTING
If you’ve made sure that the fingerboard is flat and the action correct but are still having issues perhaps the information below will help you figure out the problem.
1. Buzzing
-While played open: action is too low, nut slots are too deep, or cut at the wrong angle. The nut should be replaced.
-while fretting at a single fret: the next fret is too high.
-buzzes on frets 1-5: truss rod needs to be loosened and adjust action.
-buzzes on frets 6+: truss rod needs to be tightened and adjust action.
- One or more strings sound fuzzy or won’t note clearly as played up the neck: slots in the saddle need to be recut at the correct angle.
3. String goes sharp while playing:
-String is sticking in nut slot: first try graphite (pencil lead) in slots- slot may have to be widened or the nut replaced.
4. String goes flat
-String is sticking in bridge saddle slot: first try graphite (pencil lead) in slot- slot may have to be widened or the saddle replaced.
-Machine heads may be worn and slipping.
5. Instrument will not intonate
(If you’ve recently changed your strings make sure your saddle is not flipped, bass for treble, and that the bridge is not sitting at a steep angle across the top of the instrument.
If intonation at the 12th fret:
-Plays flat : move the bridge towards the peghead
-Plays sharp: move the bridge towards the tailpiece
I hope this helpful! Once again, don’t hesitate to contact (LINK) me with any questions or concerns you may have.
