TroubleShooting
Any of the bridge issues below will rob your instrument of tone and volume and are responsible for more players going on a new string brand or gauge hunt because their instrument just doesn’t sound like it used to. The picture is how you feel when this happens.
I know I’ve posted on this topic a few times before, however recently Bruce has gotten quite a few instruments in for miscellaneous work and noticed almost all had bridge issues: poor fit, leaning towards the fingerboard, some bases flipped bass for treble, and messed up saddle slots. It doesn’t matter what kind of bridge you use or prefer, if they aren’t fit properly to the soundboard or any of the other issues listed above, they’re all the same: Worthless for all but a string holder.
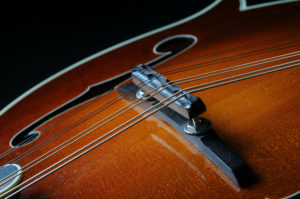
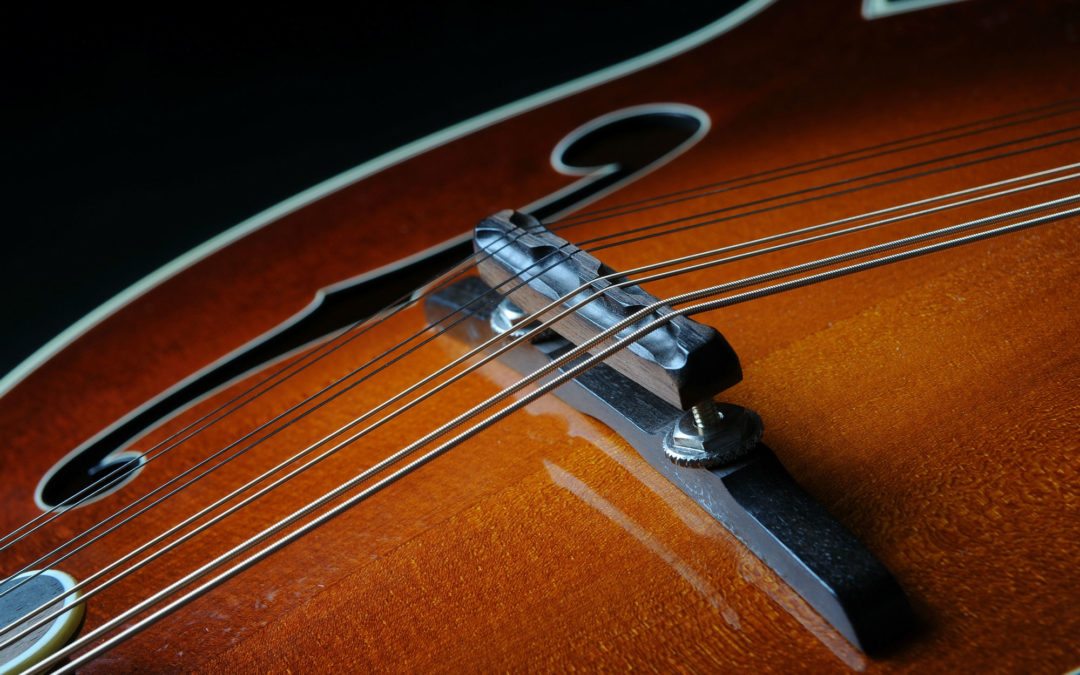
Bruce’s Take. The bridge is responsible for efficiently transferring vibration from the strings to the soundboard and on a mandolin has a footprint of about 1.4 square inches plus or minus some depending on the builder. Now picture the bridge leaning towards the fingerboard with only the bottom edge of the base making contact with the top of the instrument. This is usually due to a recent string change pulling the top of the bridge saddle as the string are brought to pitch. The footprint has been reduced to less than .5! Not much contact there to carry anything from the strings to the soundboard. The bridge should be sitting perpendicular to the top and not looking like it wouldn’t take much to push it over. Check out on our site for the fix.
Another issue that reduces the footprint intended by the builder is a poor fit. Fitting a base to an arched top instrument is tricky if you’ve never done it. The base should sit seamlessly on the top and not have a convex shape across the width of the foot or gaps. If you hold your instrument up with the peghead pointed towards a light and look closely at the bottom edge of the bridge on the tailpiece side you shouldn’t see any light passing under the bridge base where it meets the top or visible gaps. If that doesn’t work for you try pushing a piece of notepaper under the bridge base from all angles. If it slips between the base and instrument at all, it’s time to visit your local luthier. Another way to check the fit is next time you have all the strings off take a look at the finish where the bridge sits. Most will have a slight imprint in the finish or a slightly different color. Is it the same size as your bridge base?
One more. Swapping the bass and treble ends of the bridge base is pretty easy to do, especially if you don’t have mark on the bridge base indicating which is which. When we install a bridge here we mark the bottom of the base on the treble side with a T written in pencil. Check it out next time you do a string change.
As long as we’re on bridges and you’re checking your fit, take a look at your saddle string slots. The slots should be of equal depth and should have a consistent angle pointed down towards the tailpiece and not an inverted V which can cause a string or strings to sound fuzzy. A good luthier can solve this issue in minutes by dressing the slots.
As always, give Bruce a call if you have questions. We love to help players, and their instruments, sound the best they can.
TroubleShooting
Bruce estimates that 10% of the mandolins he receives for repair
have the bridge base flipped around- treble for bass.
If you notice a decline in tone/volume after a string change, check the bridge. If the base is flipped the bridge doesn’t fit well and sometimes can even cause a hum between the bridge base and the soundboard (top).
A simple precaution is to mark the bottom of the bridge base with a T and B when you take it off to ensure it goes back in the proper position.
Don’t hesitate to contact Bruce with any questions you may have and if your mandolin needs a ‘once over’ check out getting it MAC Inspected and joining the Mandolin Authority Club for discounts.
Mandolin Repair, Necks, TroubleShooting, Truss Rod
Preventable Repair #2
The neck on your instrument is bowed because the truss rod has been neglected.
There is a lot of fear involved in adjusting your instrument’s truss rod on your own, even by those who think nothing of sky diving or playing their mando in front of a huge crowd. When adjusting the rod the neck often makes snap, crackle and popping noises- and then you start to sweat while thinking, ‘what have I done!?’ Some of this fear is generated by a few horror stories that make the rounds. Mary may have contributed by posting this picture, on MandolinCafe, relating that the rod was sticking out of the back of the neck.
 Yes, cringe worthy and anxiety producing however most adjustments are done with no problems at all. I posted it again because it’s very dramatic but mostly to show how important it is to keep an eye on the neck of your mandolin and keep up with needed adjustments. I believe that anyone and everyone should pay attention, at least monthly, to “neck health” and learn how to adjust the truss rod of their instrument. The picture above is an example of a truss rod that most probably was NEVER adjusted before, then an attempt was made to force straighten the neck– trying to solve a problem created over years in a single hair rising session. Over an extended period of time, if not corrected, the neck will settle into a position where the truss rod is no longer able to straighten, requiring some TLC from a luthier.
Why adjust the truss rod: Environmental factors such as heat and humidity will expand and contract your instrument’s tone woods including the neck, affecting string height (action) and neck station. The strings exert pressure on the neck (and the top) pulling the peghead up towards the tailpiece. This string pressure is also the reason you should loosen the strings if your mando is going into long-term storage (be sure to dig it out of the closet or from under the bed to check the flatness of the neck periodically), or being shipped (with the possibility of taking a hit).
If your truss rod is not adjusted when needed (to keep the neck flat) eventually it will, at minimum, need a plane and re-fret and as worst case a new neck (as the picture above demonstrates). In reality, the truss rod is your friend. It was a great invention that will keep your neck playable.
When to adjust the truss rod: Monthly, changing seasons, travel, storage, uncomfortable or hard to play, noticeable bow in neck. See trouble shooting below.However, after reading this please free to contact The Bruce if you need additional information or a pep talk.

Be brave of heart, paint your face blue and charge through the directions below.
The correct order in basic setup: Truss rod, Action, Intonation.
TRUSS ROD ADJUSTMENT
The neck should be near flat as you sight down or lay the edge of ruler down the length of the fretboard on both the treble and bass edges. Under full string tension, just adjust the rod 1/4 turn at a time, checking the neck as you go. The neck may groan and pop a little. If the neck is slightly twisted, use the first edge to reach true as a good place to stop.
1. To take relief (bow) out of your neck, tighten the truss rod. (turn CLOCKWISE)
2. To relieve hump in the neck, (rare, unless you’ve over tightened the rod) loosen the truss rod. (turn COUNTER CLOCK-WISE)
- If the rod will not move or spins freely and you still have a bow, it would be best to visit a local luthier or send it to Bruce.
CHECK ACTION: More often than not you’ll have to adjust the action (playability) after a successful adjustment session (the fingerboard is flat). Tightening the truss rod, bringing the neck back to true, will lower the action. A good medium action on your mandolin is 1/16” from the top of the 12th fret to the bottom of the G string and a hair less on the E side. Most mandolins will have some way to adjust your action at the bridge. If you’ve over tightened the rod, the instrument will buzz on the first five frets at a good action.
CHECK INTONATON: If you’ve done either a major truss rod or action adjustment, the intonation my need to be tweaked. If the instrument plays sharp at the 12th fret, loosen all but the outside G and E strings and gently move the bridge towards the tailpiece checking the intonation on the outside strings as you go. Small movements of the bridge will serve you well in this process. If it plays flat, move the bridge towards the peghead. When you are satisfied with the intonation you can bring the remaining strings up to pitch while insuring the saddle hasn’t started leaning towards the peghead as you go (we’ve had many sent in that turned out to be just the saddle leaning, robbing the instrument of tone and volume).
Note: If you play with a high action, your bridge placement will be slightly closer to the fingerboard.
BASIC TROUBLE SHOOTING
If you’ve made sure that the fingerboard is flat and the action correct but are still having issues perhaps the information below will help you figure out the problem.
1. Buzzing
-While played open: action is too low, nut slots are too deep, or cut at the wrong angle. The nut should be replaced.
-while fretting at a single fret: the next fret is too high.
-buzzes on frets 1-5: truss rod needs to be loosened and adjust action.
-buzzes on frets 6+: truss rod needs to be tightened and adjust action.
- One or more strings sound fuzzy or won’t note clearly as played up the neck: slots in the saddle need to be recut at the correct angle.
3. String goes sharp while playing:
-String is sticking in nut slot: first try graphite (pencil lead) in slots- slot may have to be widened or the nut replaced.
4. String goes flat
-String is sticking in bridge saddle slot: first try graphite (pencil lead) in slot- slot may have to be widened or the saddle replaced.
-Machine heads may be worn and slipping.
5. Instrument will not intonate
(If you’ve recently changed your strings make sure your saddle is not flipped, bass for treble, and that the bridge is not sitting at a steep angle across the top of the instrument.
If intonation at the 12th fret:
-Plays flat : move the bridge towards the peghead
-Plays sharp: move the bridge towards the tailpiece
I hope this helpful! Once again, don’t hesitate to contact (LINK) me with any questions or concerns you may have.
